![]()
![]()
![]()
![]()
| Search: |
|
How To Temporarily Add Permissions to a User
|
Overview: This walkthrough shows how to temporarily add permissions to a User.
From time to time, it may become necessary to add permissions to a User for a short time.
For example, when an employee is on vacation or sick leave it may be necessary for another employee
to perform the additional work. These changes can quickly be done using Easy Security.
To temporarily add permissions to a User: 1) Open the Login Card of the User you want to add permissions to. 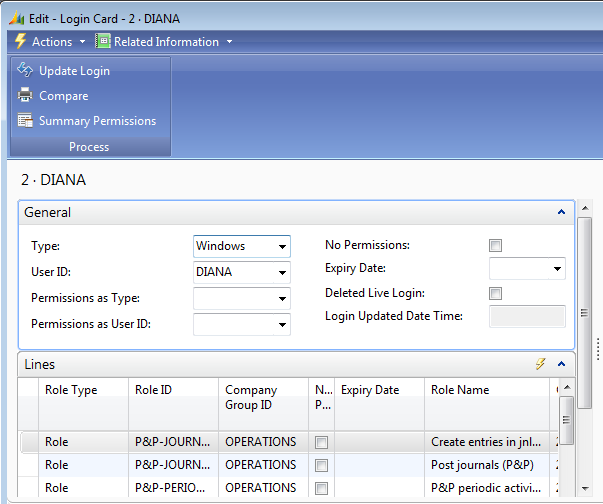
2) Add a line for the permissions you want to add. When you tab off the Company Group ID field, the following message appears "Insert Permission for the "Blank" Company Group?". 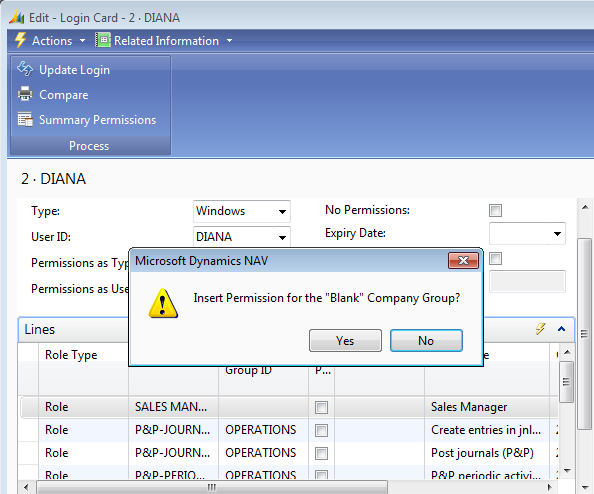
3) Click Yes if you want to provide the Login access to all of the companies in the system. NOTE: It is not normal for a Login to be given access to all companies. For more information on the effects of adding the "Blank" Company or "Blank" Company Group to a Role, please see: How To Add an Access Control to a Login 4) Click No if you do NOT want to provide the Login access to all the companies in the system. You must then select one or more Companies in the Company Group ID field. The selected companies will display in the Company List field showing in the Role lines. 5) You can set a future date in the Expiry Date field on the Access Control line if you want this Access Control to end on a specified date. In this example SALES MANAGER is added with an Expiry Date of 08/1/2013. When the Publish Permissions routine is run on 08/1/2013, a checkmark will automatically be placed in the No Permissions field on the SALES MANAGER Access Control line. At that time, the Login will no longer have the permissions associated with the SALES MANAGER Role. 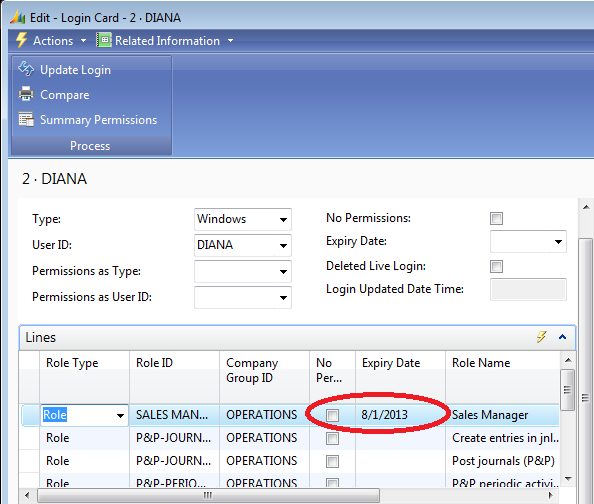
6) All of the permissions for a Login Card can be removed using the Expiry Date field on the Login Card header. The Expiry Date and No Permissions fields on the header work the same way as these fields work on the Access Control lines. When the Publish Permissions routine is run on 08/1/2013, a checkmark will automatically be placed in the No Permissions field on the Login Card header. The Login will no longer have permissions available to it. 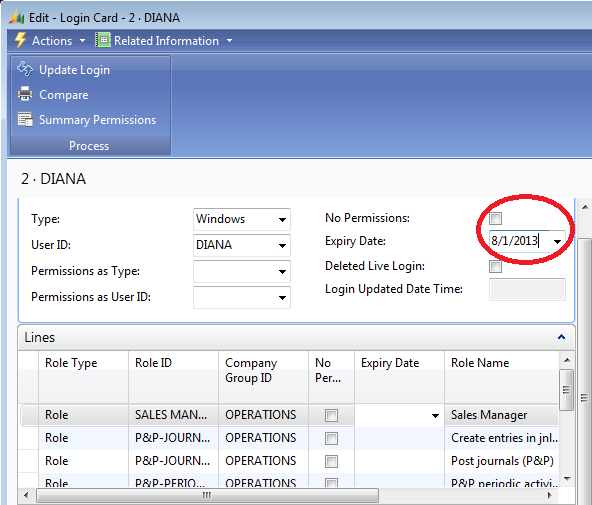
7) You can also manually add a checkmark in the No Permissions field on an Access Control Line or on the Login Card header and run the Publish Permissions feature to remove permissions for this Access Control or Login immediately. Removing the checkmark from the No Permissions field and running the Publish Permissions feature again returns the permissions to the Login. This feature prevents the need to delete/add lines to remove/add permissions. 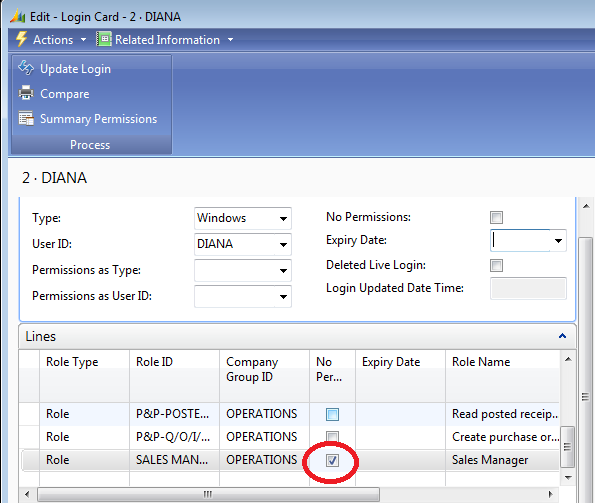
8) The Publish Permission feature needs to be processed in order for the changes to take effect. The Publish Permissions feature can be run from the Advanced features from the Login Card. Permissions will be published based on the settings in the Publish Permissions window. 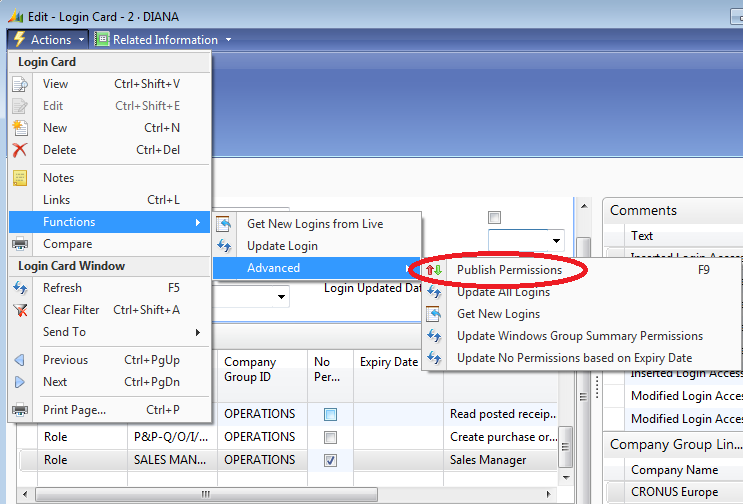
9) In order for the No Permissions field to be updated with a checkmark when an Expiry Date is due, the Update No Permissions based on Expiry Date: field must be checked on the Publish Permissions window. This causes the Publish Permissions feature to review the dates in the Expiry Date fields. 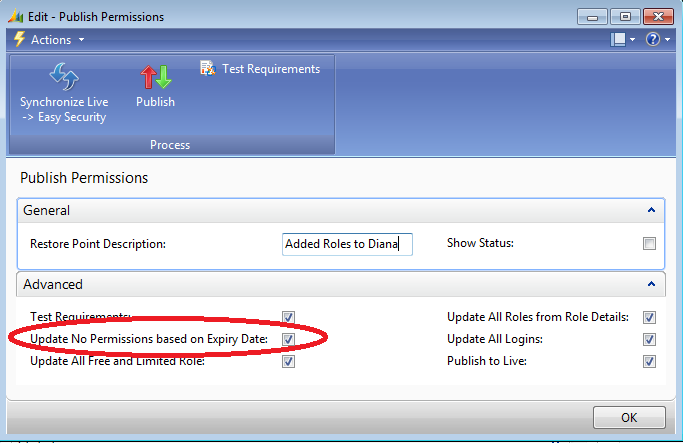
10) You can also run the Publish Permissions feature from the Logins and Permissions menu under Functions Advanced. 11) Receive the message "Permissions have been successfully published". 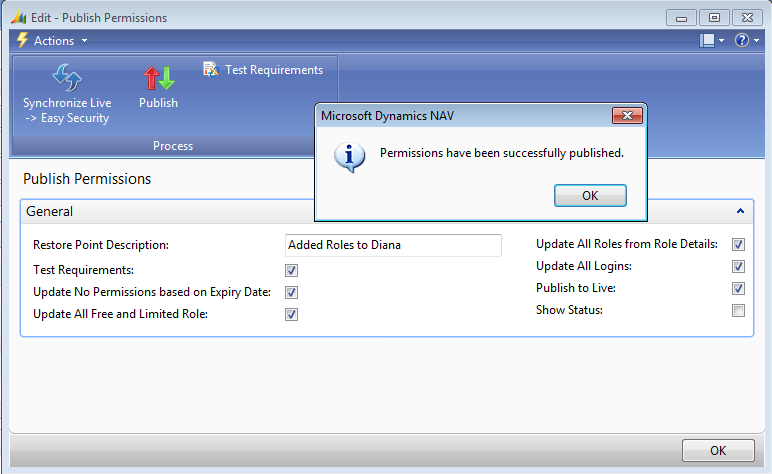
|
|
Like  Don't Like
© 2024 Mergetool.com. All rights reserved. 
|
Related resources
Download software from Mergetool.com