![]()
![]()
![]()
![]()
| Search: |
|
How To Compare Restore Points
|
Overview: Restore Points are snapshots of the security system setup for a Company.
Every time the Publish Permissions function is processed, two Restore Points are created. One Restore Point is made of the Easy Security Company and the second Restore Point is made of the Live Company. This walkthrough explains how to compare Restore Points to view the changes that occurred from one Restore Point to another. To compare Restore Points: 1) Open the Restore Points list window. Note the columns that identify the Restore Points: Live Restore Point, Easy Security Restore Point and Imported Restore Point. Click Compare to open the Edit Compare Restore Point window. 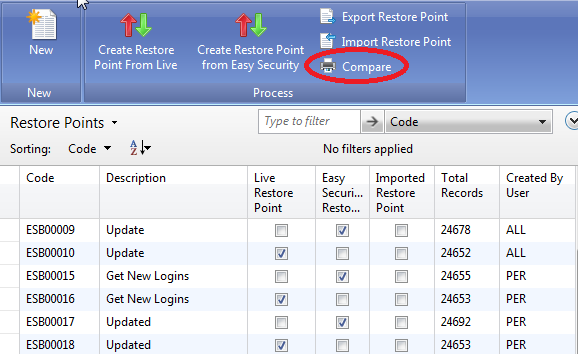
2) Select the desired Report Format. Enter checkmarks in the boxes of the information you would like to include in the compare report. In this example the Compare, Windows Logins, Roles and Role Permissions boxes are checked. On the Restore Point tab, select a Restore Point. On the Compare to Restore Point tab, select the Restore Point you want to compare to the Restore Point selected on the Restore Point tab. Click the OK button to view the comparison text file. 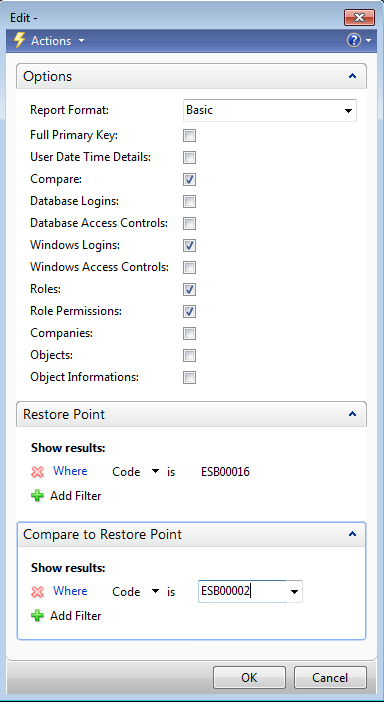
3) The View Text Lines Restore Point Indented/Restore Point Basic (depending on the selected format) window opens to display the comparison information. If you scroll through the lines, you will notice that there are lots of lines. Most of the lines show Equal which means they did not change between the two Restore Points. Click the Show Only Include in Log function in the Action Pane. 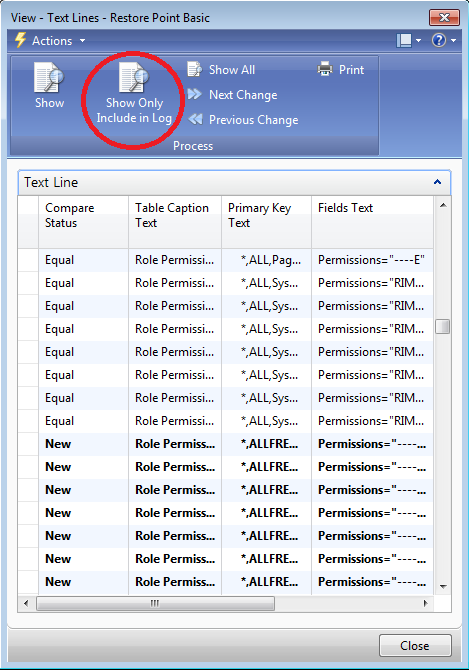
4) Clicking the Show Only Include in Log option reduces the number of lines shown to only those lines where changes occurred. The changed lines are bolded. You can see in the following screenshot that several New Role and New Role Permissions were added from one Restore Point to the other. 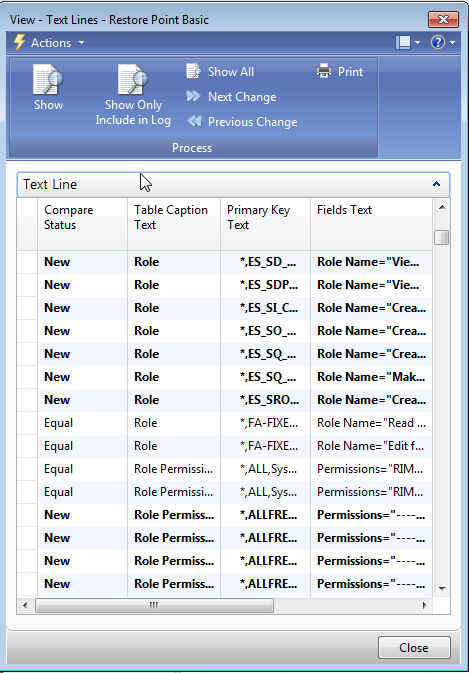
5) You can use other features on the View Text Lines Restore Point window to see more information about any line you wish. In this example a New Login was selected and Show was clicked in the Action Pane. This opened the View Restore Point Windows Logins window. From here you can click on Access Controls and see all the Access Controls that were assigned to this Login. Other features exist such as Next Change, Previous Change and Show All. 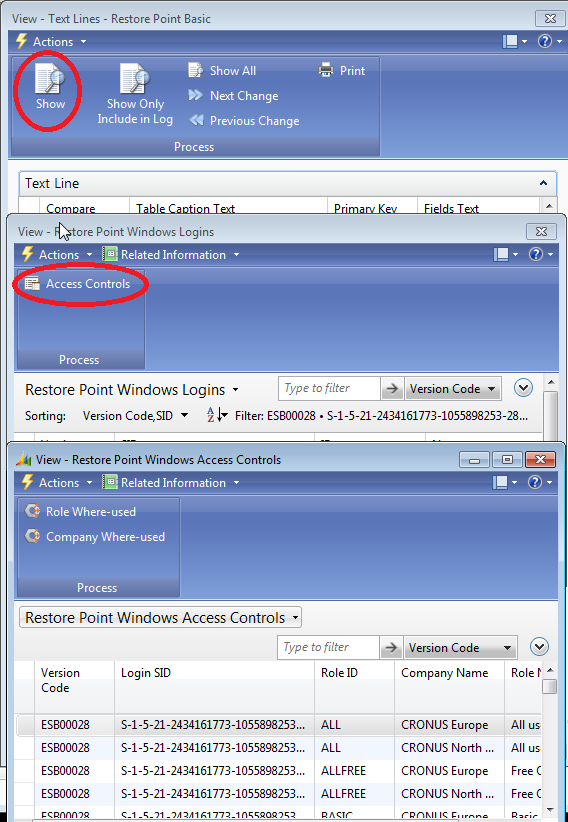
6) The number of non-bolded lines that appear between the bolded lines is controlled by the setting in the Security Setup Form/General Tab in the Lines to Include in Log: field. Normally the value is set to a low number. This setting works with the Show Only in Log feature. 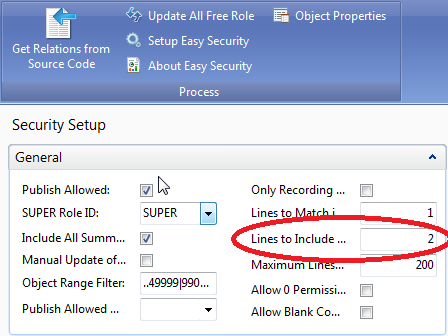
|
|
Like  Don't Like
© 2024 Mergetool.com. All rights reserved. 
|
Related resources
Download software from Mergetool.com