![]()
![]()
![]()
![]()
| Search: |
|
How to Use the Expiry Date, No Permissions and Permissions as User ID
|
Overview: This provides information on how to use the Expiry Date, No Permissions and Permissions as User ID Functions.
To view the information in a video, see:
Maintaining Logins To use the Expiry Date, No Permissions and Permissions as User ID Functions: 1. Open a Login Card and add a Permission Set or a Group to the Login. 2. Enter a future date in the Expiry Date field that you want this Permission Set to no longer be valid. 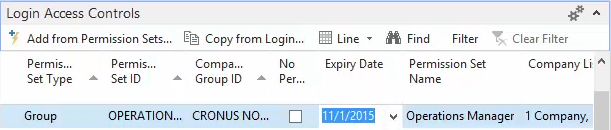
3. Run the Update Login Action to calculate the Access Controls and Summary Permissions. 4. When the Publish Permissions function or the Update Selected in Live Action is run after the Expiry Date is passed, a checkmark will be placed in the No Permissions field on the line. The Login will no longer have permissions for that line. 5. If the permissions need to be added back again in the future, just remove the checkmark from the No Permissions field, enter a new future date in the Expiry Date field and run the Publish Permissions function or the Update Selected in Live Action to push the changes to the Live Companies. 6. Additional tables can be included in Summary Permissions if desired. Please see the following FAQ for additional information on adding tables to Summary Permissions. How To Use Summary Permissions to Verify Login Permissions 7. The Set No Permissions function can be used to set multiple lines to No Permissions. This can be useful when testing new permissions. The Set No Permissions function removes the permissions for the existing lines until such time you use the Reset No Permissions routine to restore the permissions. 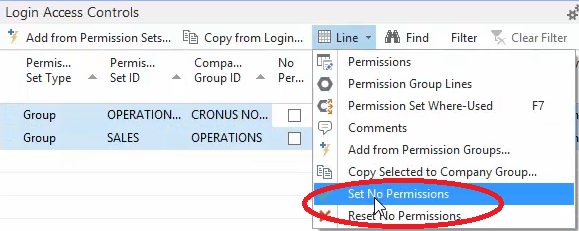
8. All permissions can be removed for a Login by manually entering a checkmark in the No Permissions field in the Login Card header and running the Publish Permissions or Update Selected in Live Action. 
9. All permissions can also be removed from a Login by entering a future date in the Expiry Date field and running the Publish Permissions or Update Selected in Live Action after the Expiry Date is passed. 10. Select a Login that has no permissions assigned. 11. In the Permissions as User ID field select a Login that has permissions assigned. The Permissions Sets or Groups that are assigned to a Login are displayed in the Login Access Controls Fact Box. 12. Run the Update Login Action for the Login and notice that the values in the Access Controls, Summary Permissions, Permissions Sets, etc. fields match the values for the Login that was selected in the Permissions as User ID field. 13. This feature makes it very easy to provide multiple Logins with the exact same set of permissions. If the permissions need to be changed, you only have to change them on the one Login. The changes automatically flow through to the other Logins. 14. From the Easy Security Company, click on the Live menu option. This allows you to view the Users in the Live Companies. 15. View any of the Users that you have been working with. It is important to note that none of the changes that have been made in Easy Security are in the Live Companies. Easy Security works offline. The changes do not get into the Live Companies until one of the Publish routines is run. 16. Do a full publish using the Publish Permissions available from the Easy Security Main menu. This will push the changes from the Easy Security Company to the Live Companies. If you don't receive the following message, then the publish routine did not complete successfully. 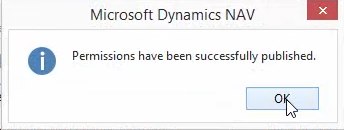
17. From the Easy Security Company, click on the Live menu option. 18. View any of the Users that you have been working with. The changes made in the Easy Security Company are now visible in the Live Companies. 19. To remove permissions that should not have been given to a Login, manually check the No Permissions field on a Login line and run the Update Selected in Live Action. Confirm the actions. 20. Use the Live menu option to view the changed Login and verify that the changes were made in the Live Companies. |
|
Like  Don't Like
© 2024 Mergetool.com. All rights reserved. 
|
Related resources
Download software from Mergetool.com