![]()
![]()
![]()
![]()
| Search: |
|
How to Record Permission Sets with NAV Easy Security Light
|
Overview: This provides step-by-step instructions on how to import the NAV Easy Security SQL Profiler
template and use the SQL Profiler to make recordings in NAV. The recordings are imported into NAV to create new Permission Sets.
The recordings can also be used to add permissions to an existing Permission Set.
The steps follow the information in the video - Recording Permission Sets with NAV Easy Security Light.
Link to video: Recording Permission
Sets with NAV Easy Security Light To import the Easy Security SQL Profiler Template and create a recording: 1) Open SQL Server Management Studio. 2) Open SQL Server Profiler. 3) Import the NAV Easy Security Template. The templates are included in the NAV Easy Security Light software package. The version of the SQL Profiler template should be equal to or be a newer version than the SQL version the NAV database is running on that you are recording against. 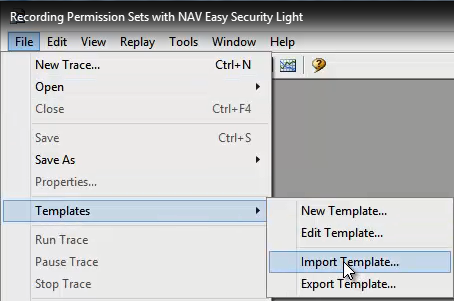
4) Set Filters on the Events Selection tab to ensure the correct information is captured. Additional filters (database name, login name, etc.) can be set on the Events Selection tab of the template. 5) These filters can be saved so they don't have to be entered again. In NAV 2013 and later, please be aware that if you want to set a filter on the Login Name, the name is not going to be the name a user logs into NAV with. In NAV version 2013 and later, the Service Tier is what logs into the SQL database. Therefore it is suggested that a Service Tier be created just for making recordings with the SQL Profiler. To create a Service Tier just for making recordings - see the FAQ - How to create a NAV Server instance for recordings in NAV 2013. Link to FAQ: How to create a NAV Server instance for recordings in NAV 2013 6) Set the NAV Easy Security template as the default template and save the Filters set earlier. 7) Start a new Trace to ensure a connection has been made to the correct database. Stop the Trace. 8) Restart the Service Tier to clear the Cache. The Service Tier must be restarted prior to making EACH recording. Restarting the Service Tier clears data from the Cache. This ensures that all required data will be captured in the Trace File. 9) Start the Trace. 10) In NAV, perform the task you want to make a recording of. 11) When the task is complete, stop the Trace and save the file as a Trace XML File in a location that is accessible by the Service Tier. 12) Return to NAV and create a new Permission Set. 13) Import and process the Trace XML File created earlier. Be sure to check the Additional Related Permissions box. 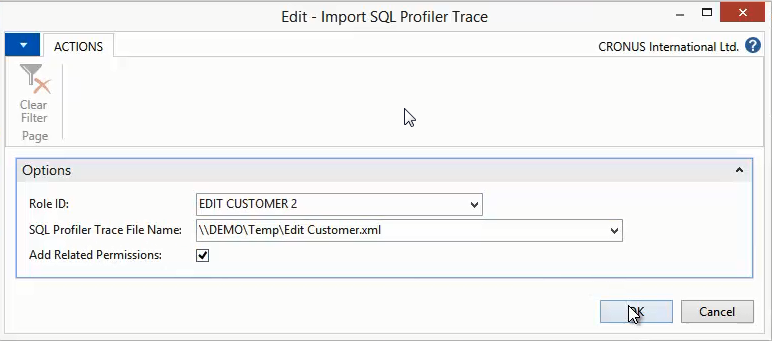
14) A message displays the number of Events imported, the number of records imported and/or modified. It also displays the number of related permissions that were added. 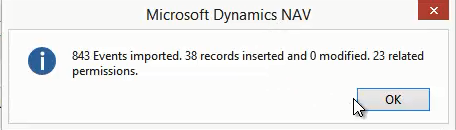
15) The Permission Set is now ready to be used. |
|
Like  Don't Like
© 2024 Mergetool.com. All rights reserved. 
|
Related resources
Download software from Mergetool.com