![]()
![]()
![]()
![]()
| Search: |
|
How To Create a New Role Using SQL Profiler
|
Overview: This walkthrough shows how to create a new Role for creating Sales Orders using
the SQL Profiler. SQL Profiler is a graphical tool that allows system administrators to monitor events in an instance of SQL Server. Use the SQL Profiler to monitor only the events in which you are interested. If traces are becoming too large, you can filter them based on the information you want, so that only a subset of the event data is collected. Monitoring too many events adds overhead to the server and the monitoring process and can cause the trace file or trace table to grow very large, especially when the monitoring process takes place over a long period of time. NOTE: In SQL Server 2005 and later, trace column values greater than 1 GB return an error and are truncated in the trace output. When recording from the Classic Client, either set object cache to zero or close and reopen the database before you start the recording. This will ensure that all the object activities performed during the recording process are captured. When recording from RTC, either set object cache to zero or restart the NAV Server service before starting a recording. In RTC, objects are cached on the server, not on the client. In order to avoid disrupting other users when restarting the NAV service, we recommend setting up a separate NAV Server instance to be used for recordings. See Installing additional NAV Service Tier for recording of permissions Also How to set Object Cache to zero for recording The same principle can be used to create any Permission Set. Before you start the SQL Server Profiler Trace, have NAV open to the correct location to capture just the data required to perform the functions of the Role that is being created. This will reduce the amount of data captured by the SQL Server Profiler Trace. For this example have NAV open to Sales Orders. NOTE: Be sure to have the SQL Profiler running before you open the Sales Order window. Also be sure you have closed the Sales Order window before stopping the SQL Profiler. The SQL Profiler Trace needs to capture the opening of the Sales Order window and the closing of the Sales Order window to be sure all events are captured. 1) From SQL Server Profiler click File/New Trace. 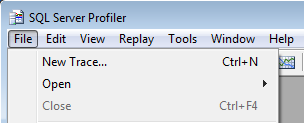
2) Click the Connect button to connect to the server. 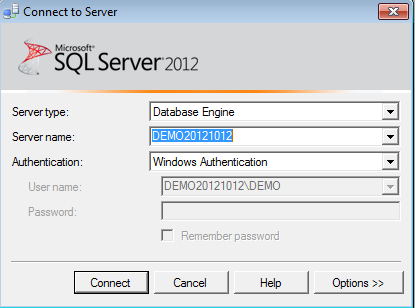
3) The Trace Properties window opens. Enter a Trace name that makes sense for the file being created. Be sure you have selected the correct template in the Use the template: field. 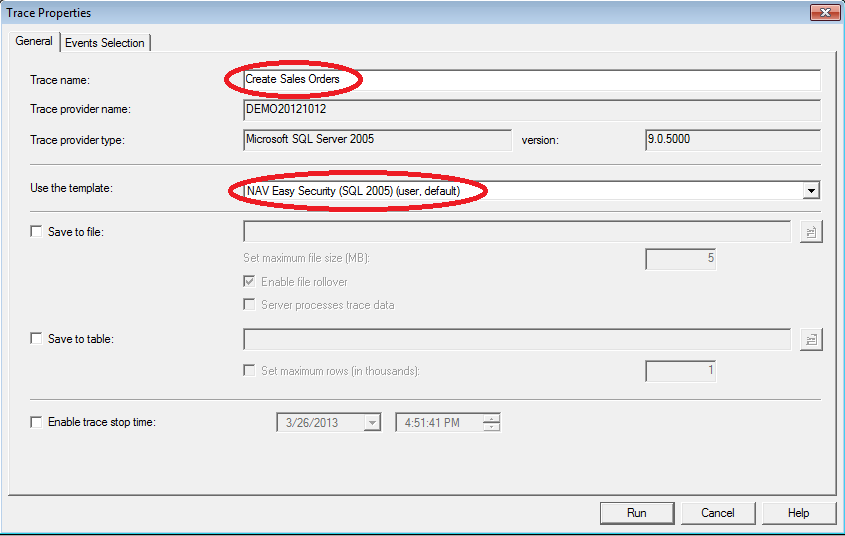
NOTE: Templates that are to be used with Easy Security are available in the Easy Security download files. Templates for several versions of SQL are included in the SQL Profiler folder in the Easy Security download package. Use the following link to download the latest files. Download NAV Easy Security For information on how to import the SQL Profiler template for Easy Security, please see the video at the following link. The information on how to import the template is covered in the first 2 minutes of the 9 minute video. Or you can review the document at the following link for written instructions. How To Import an Easy Security SQL Profiler Template Recording with the SQL Profiler 4) Click on the Events Selection tab. Click on the Column Filters� button to open the Edit Filter window. Various filters can be set here to select or reduce the type and amount of data that is captured by the trace. This example shows that a filter has been set to capture only events that are performed by the Login Susan. After the filters have been set, click OK to close the Edit Filter window. 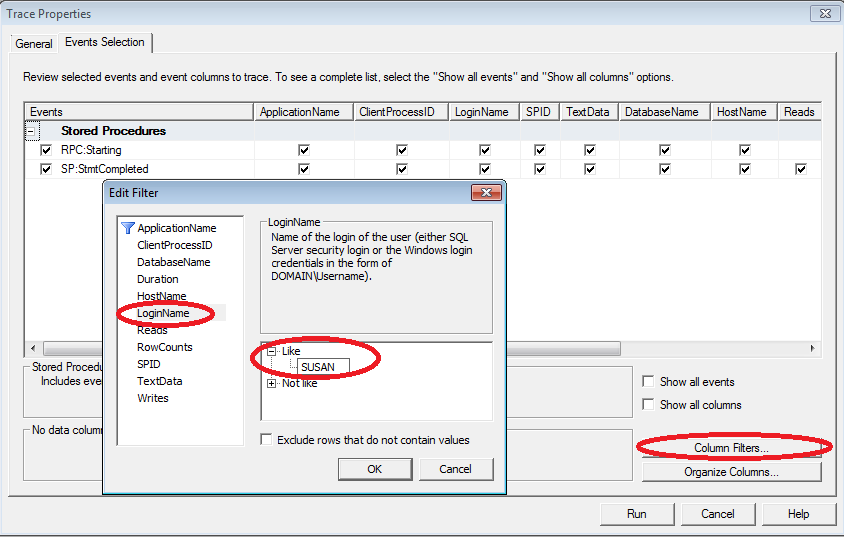
5) Click on the Run button to start the SQL Profiler Trace. 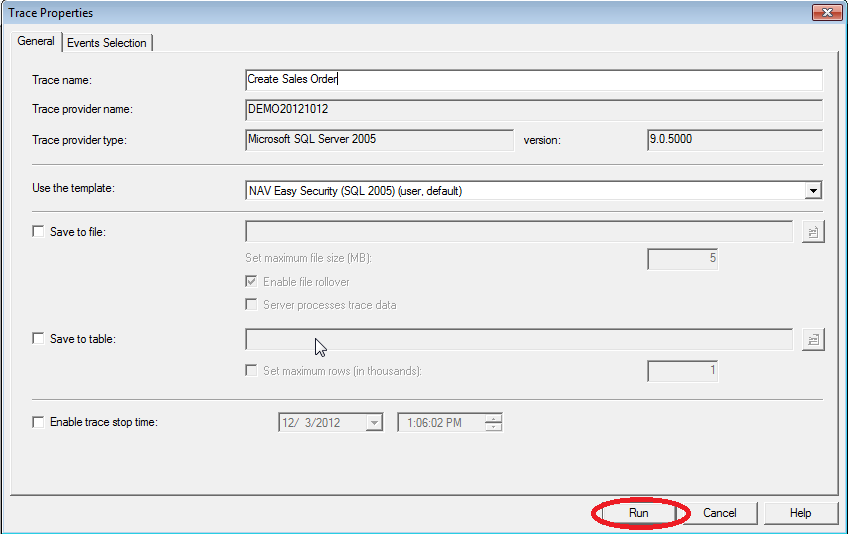
6) Return to NAV and Create a new Sales Order. Add a line for an item, resource, etc. plus a quantity. The delete permission is not given by default. To include the delete permission, add a second line and delete it. If you wish the user to be able to delete Comments, add a Comment and delete it. Close the Sales Order. 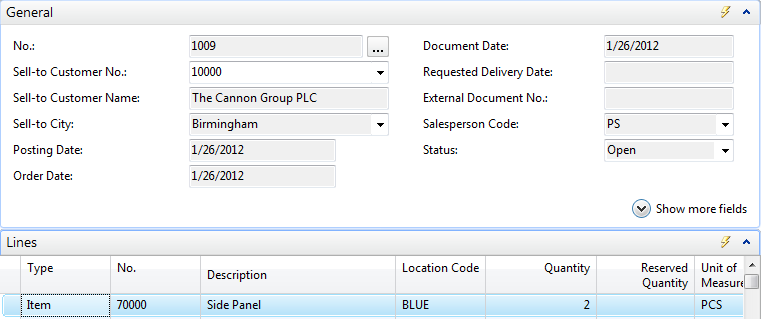
7) Stop the SQL Profiler Trace. Click on File/Save As/Trace XML File. 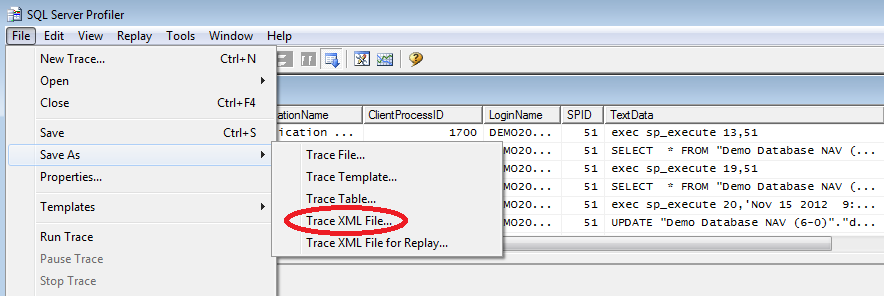
8) Go to Logins and Permissions to create a New Role. Click on New and enter a name in the Role ID field and the Name field. 9) Click on Add New Recording to open the Recordings window. 10) Click on the line and add the path to the SQL Profiler Trace created earlier and click on Import SQL Profiler Trace. 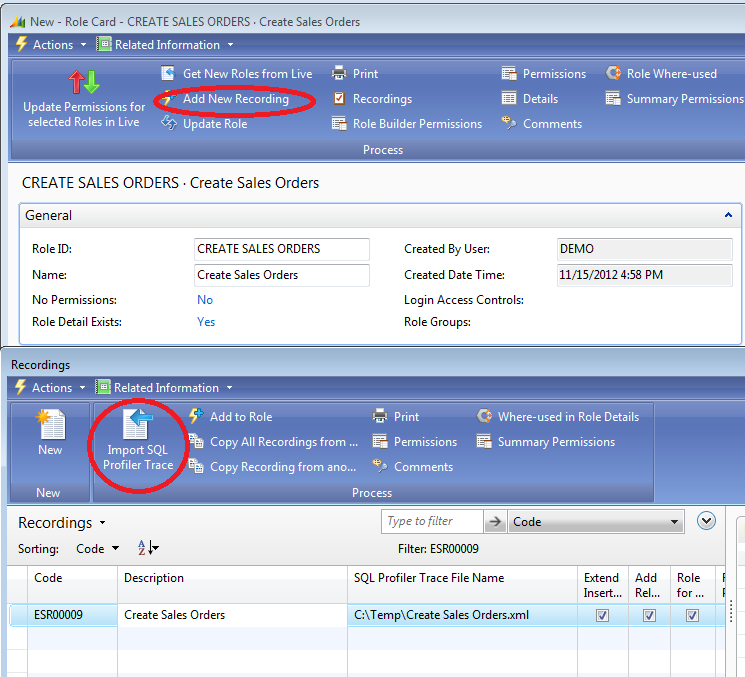
11) Once the trace file import has completed, review the information displayed in the Trace Clients window. Edit the list and remove the checkmark from the lines you do not want to import. NOTE: If filters were not set on the Events Selection tab of the Trace Properties window, trace files were created for all activities occurring on the SQL Server. These activities could be from other databases, services, users, etc. In the example below, trace files were created for two NAS (Navision Application Server) activities along with a file for the NT Authority/Network Service. These files should not be imported, so the checkmarks were removed from the respective boxes to prevent the files from being imported. Click the OK button to complete the import of the marked trace files. 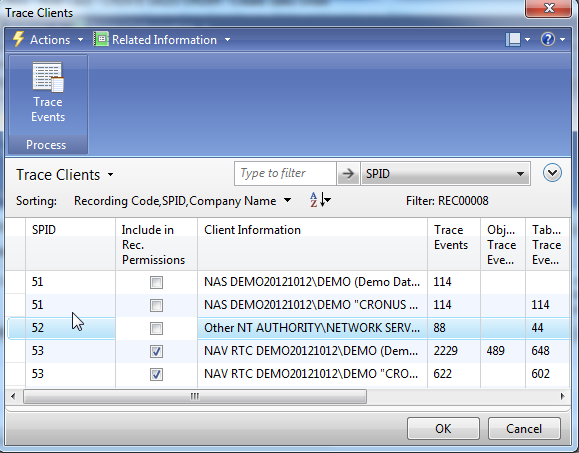
12) A window displays a summary of the data that was imported. Notice that 92 records were imported. Click the OK button to close the window. Click the OK button to close the Recordings window which will attach the recording to the Role. 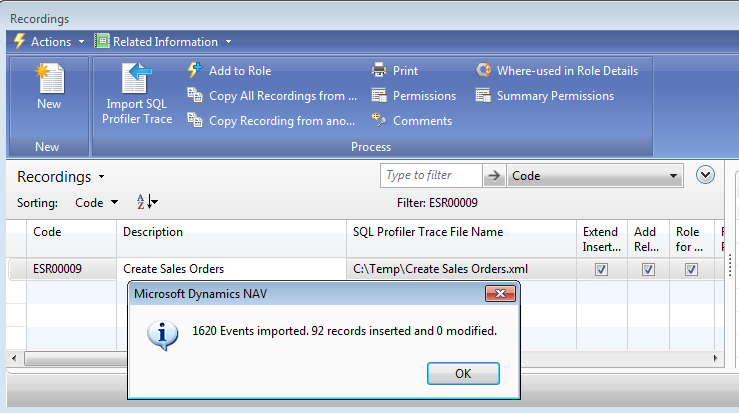
13) Click Update Role from the Role Card. A window displays a summary of the data that was updated. When the Role was imported in step 12 above, it showed that 92 records were imported. However after the Role was updated, the information states that 165 permissions were inserted for the CREATE SALES ORDER Role. The additional permissions were added to the Role based on the information gathered by the Source Code Analyzer. The Source Code Analyzer scans the actual code in the database. It then updates permissions by adding table relations and flowfield definitions that are needed by the Role based on the information gathered from the code. This makes the creating of Roles much easier since you do not have to know all the other permissions that the Role will need. The Source Code Analyzer does that for you. Click OK to close the summary window and click OK again to close the Role Card. Click on the following link for additional information on the Source Code Analyzer. Easy Security: The Technical Side 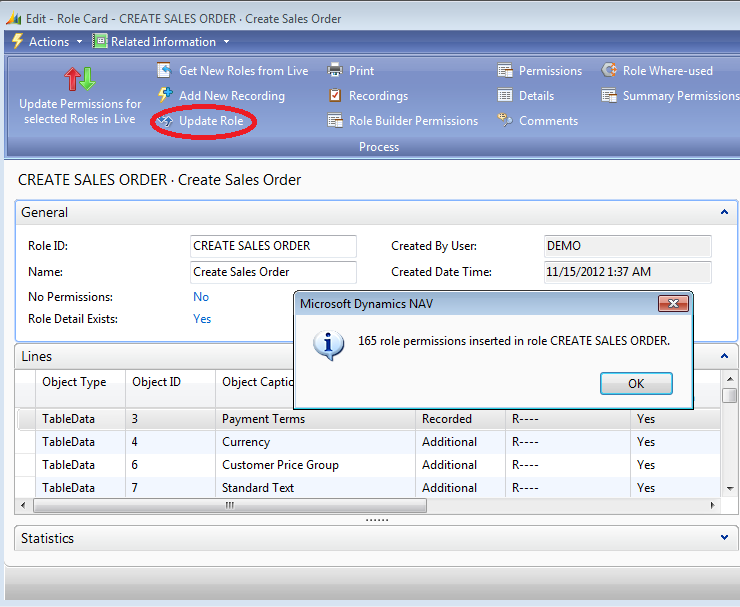
14) Publish the new Role. It is now ready to be used. 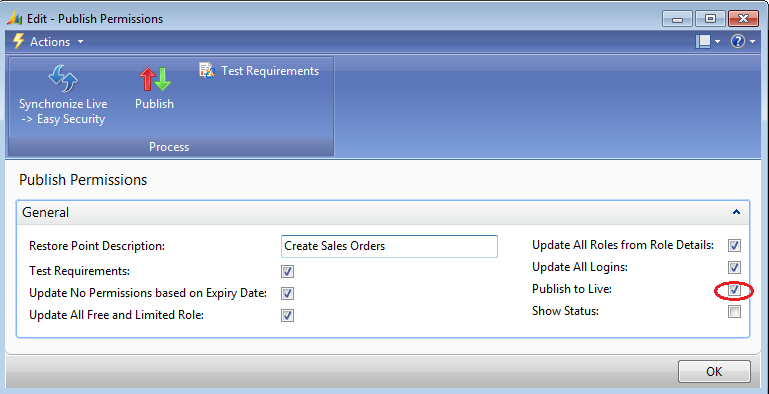
|
|
Like  Don't Like
© 2024 Mergetool.com. All rights reserved. 
|
Related resources
Download software from Mergetool.com